Using GeoPackage with Software / QGIS
- How to Create a GeoPackage in QGIS 2
- How to Create a GeoPackage in QGIS 3
- How to Read a GeoPackage in QGIS 2 or QGIS 3
- Resources
How to Create a GeoPackage in QGIS 2
- Open QGIS 2 Desktop.
- Add the spatial data layers to the Layers Panel that are to be feature classes in the GeoPackage.
-
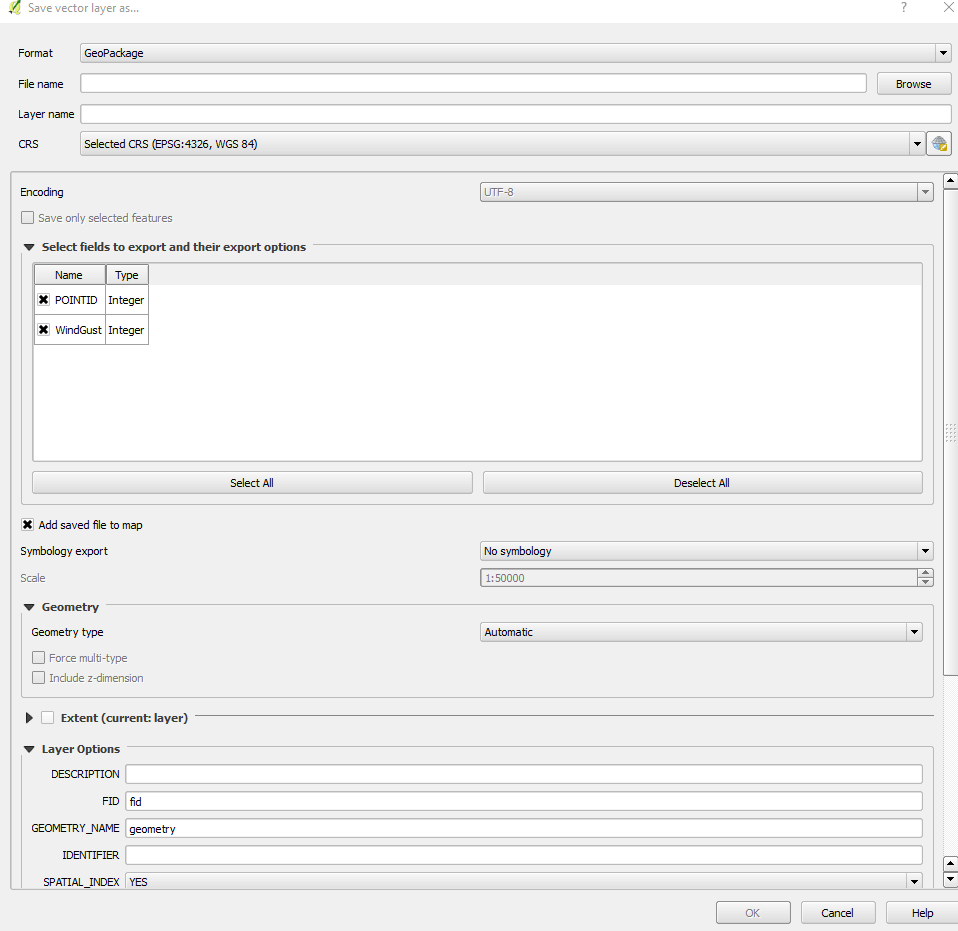
Right-click on the first layer in the Layers Panel. Click Save as. The Save vector layer as ... window will appear.

Save vector layer as ... Window (see also the full-size image)
- Select
GeoPackagein the Format field. - Click the Browse button next to the File name field. Browse to the location to save the GeoPackage file. Give the GeoPackage file an appropriate name. Click Save.
- Give the layer a unique name in the Layer name field.
- Update the other layer properties as appropriate.
- Click OK.
- Select
-
For all following layers, right-click on the layer in the Layers Panel. Click Save as. The Save vector layer as ... window will appear.
- Select
GeoPackagein the Format field. - Click the Browse button next to the File name field. Browse to the existing GeoPackage file. Click Save.
- Give the layer a unique name in the Layer name field.
- Update the other layer properties as appropriate.
- Click OK.
- Select
How to Create a GeoPackage in QGIS 3
- Open QGIS 3 Desktop.
- Add the spatial data layers to the Layers Panel that are to be feature classes in the GeoPackage.
- Click Processing > Toolbox.
-
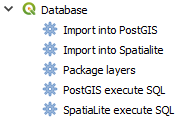
Expand the Database option.

Database Tools (see also the full-size image)
-
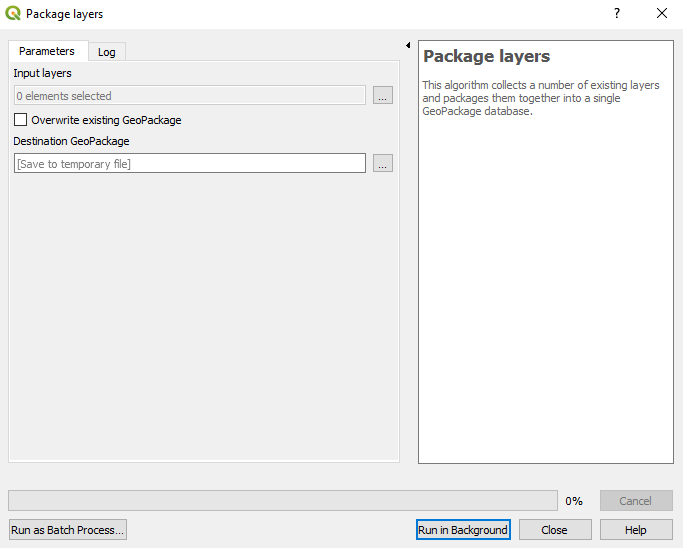
Double-click the Package layers option. The Package layers window will appear.

Package layers Window (see also the full-size image)
- Click the ... button next to the Input layers field. Select the layers to add to the GeoPackage file. Click OK.
- Click the ... > Save to File ... button next to the Destination GeoPackage field. Browse to the location to save the GeoPackage file. Give the GeoPackage file an appropriate name. Click Save.
- Click Run in Background.
How to Read a GeoPackage in QGIS 2 or QGIS 3
- Open QGIS Desktop.
- Open Windows File Explorer. Navigate to the GeoPackage file (ends in
.gpkg). - Drag and drop the GeoPackage file into QGIS Desktop.
-
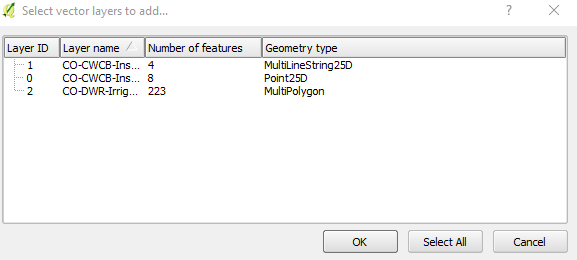
If the GeoPackage file has more than one feature class, a Select vector layers to add... window will appear with the feature classes listed. Select the desired feature classes and click OK.

Select vector layers to add... Window (see also the full-size image)
The layers will display in the Layers Panel. If the GeoPackage file has only one feature class, the layer will automatically display in the Layers Panel.